
Smart House Cleaning Tips by Room Time Saving Tools and Eco Friendly Routines
A clean home is easier to enjoy when cleaning does not take over the whole weekend. The trick is not to work harder. It is to work in a better order, keep the right tools close, and build routines that fit real life.
Good domestic cleaning has a rhythm. Some jobs need daily attention, like wiping kitchen counters. Others can wait for a weekly reset, like hoovering under furniture. A few only need a monthly slot, such as cleaning skirting boards or washing light fittings.
The aim is simple: less panic cleaning, fewer lost hours, and a home that feels calmer most days.

Start with a simple room-by-room plan
Cleaning feels bigger when every task sits in one vague pile called “the house”. Break it down by room and the work becomes easier to see.
Instead of thinking, “I need to clean everything,” use a room list:
Kitchen
Bathroom and toilet
Living room
Bedrooms
Hallway and stairs
Utility areas, cupboards, and storage spots
Then give each room a short task list. Keep it realistic. A kitchen list might include clearing surfaces, wiping worktops, cleaning the hob, washing the sink, sweeping the floor, and mopping. That is far more useful than a general note that says “clean kitchen”.
A good room plan also stops you repeating effort. For example, dust before hoovering. Clear surfaces before wiping them. Spray bathroom cleaner before tackling the mirror, so the product has time to work.
One helpful pattern is top to bottom, dry to wet, clean to dirty.
Work from high shelves down to floors. Dust before using sprays. Clean less dirty areas before sinks, loos, bins, and pet areas. This keeps grime from spreading and saves time.
Keep essential cleaning supplies in one easy kit
The right supplies make cleaning quicker because there is less searching, swapping, and improvising. You do not need a cupboard full of specialist products. A small, reliable kit covers most domestic jobs.
A basic home cleaning kit can include:
Microfibre cloths in different colours
Non-scratch sponges
A soft scrubbing brush
An old toothbrush for taps, grout, and corners
Washing-up liquid
Multi-surface cleaner
White vinegar
Bicarbonate of soda
Glass cleaner or a vinegar solution
Disinfectant for high-touch and unhygienic areas
Rubber gloves
A mop and bucket, or a spray mop
A hoover with attachments
Bin bags and recycling bags
Colour-coded cloths are worth using. For example, keep one colour for bathrooms, one for kitchens, and one for general dusting. This helps avoid cross-contamination without needing to think too much.
A cleaning caddy is also a small upgrade with a big impact. Put sprays, cloths, gloves, and brushes in one portable basket. Carry it from room to room so supplies move with you.
Tool | Best use | Time-saving tip |
Microfibre cloth | Dusting, polishing, wiping surfaces | Use dry for dust and damp for marks |
Extendable duster | Shelves, light fittings, cobwebs | Dust high areas before hoovering |
Hoover attachments | Stairs, sofas, corners, skirting boards | Keep the crevice tool clipped nearby |
Spray mop | Hard floors | Use for quick midweek floor resets |
Scraper or hob blade | Ceramic hobs and stuck-on marks | Use only on suitable surfaces and follow care instructions |
Store refill products together, but keep the daily-use kit small. Too many products in the caddy slow you down.
Clean the kitchen in the right order
The kitchen usually needs the most frequent attention. Food prep, crumbs, spills, bins, and washing up all add to the workload. A clear order stops the job becoming messy halfway through.
Start by clearing the room. Put food away, load the dishwasher, wash anything left in the sink, and remove items that belong elsewhere. A surface is always easier to clean when it is not covered.
Next, apply cleaner where it needs a few minutes to work. This might mean spraying the hob, sink, splashback, or inside of the microwave. While it sits, wipe cupboard handles, appliance fronts, and worktops.
Then move to the sink. Scrub around the taps, plug, and draining board. An old toothbrush is excellent for the small ring of grime that forms around tap bases.
For the microwave, heat a microwave-safe bowl of water with a splash of vinegar or a few lemon slices for a few minutes. Let it sit briefly, then wipe the softened splatters away. Avoid harsh scrubbing inside appliances unless the manufacturer says it is safe.
Finish with the floor. Sweep or hoover first, then mop. If the floor is only lightly marked, spot clean rather than mopping the whole room.
Quick kitchen reset
Use this after dinner or before bed:
Clear and wipe worktops.
Wash up or load the dishwasher.
Wipe the hob if used.
Empty the food waste if needed.
Sweep visible crumbs.
This can take less than 15 minutes when done regularly.

Make bathrooms easier with frequent small cleans
Bathrooms become harder to clean when soap scum, limescale, and moisture build up. Small, frequent cleans work better than occasional heavy scrubbing.
Start by removing bottles, towels, bath mats, and anything sitting around the sink or bath. Spray the bath, shower, sink, and taps with a suitable cleaner. Give it time to loosen marks.
Clean mirrors and glass first, before moving to dirtier areas. A glass cloth or squeegee helps prevent streaks. For shower screens, use a squeegee after showers during the week. This one habit can reduce water marks and limescale build-up.
Clean the sink next. Wipe around taps, the plughole, and the pedestal or vanity unit. Then clean the bath or shower tray. Pay attention to corners, sealant lines, and the area around shampoo bottles.
Leave the toilet until near the end. Apply toilet cleaner under the rim, scrub with the brush, then wipe the seat, lid, flush handle, and outer base with a suitable disinfectant.
Finish with the floor. Shake out or wash bath mats regularly, as they collect damp, dust, and hair.
For an eco-friendlier bathroom routine, try:
White vinegar on limescale-prone taps and shower screens, where suitable
Bicarbonate of soda paste for light sink and bath marks
Refillable spray bottles
Washable cloths instead of disposable wipes
Good ventilation to reduce mildew
Never mix cleaning products, especially bleach with vinegar or ammonia-based products. It can create harmful fumes. Use one product at a time and rinse if changing products.
Give living areas a fast dust and floor routine
Living rooms and family spaces gather dust, crumbs, pet hair, toys, books, and daily clutter. The best strategy is to reset the room before cleaning it.
Start with a laundry basket or storage tub. Walk around the room and collect anything that belongs elsewhere. Do not leave the room to put each item away one by one. That turns a quick clean into a wandering session. Gather first, return items later.
Next, dust from top to bottom. Start with shelves, picture frames, lampshades, and television stands. Then move to tables, windowsills, and skirting boards. Use a dry microfibre cloth for dust and a lightly damp cloth for marks.
Soft furnishings need regular attention too. Plump cushions, fold throws, and hoover the sofa with an upholstery attachment. If there are pets in the home, a rubber glove or pet hair tool can lift hair from fabric before hoovering.
Finish with floors. Hoover rugs and carpets slowly enough for the machine to pick up dust. On hard floors, hoover or sweep before mopping.
For a five-minute living room reset:
Collect cups, plates, and rubbish.
Put remotes, books, and toys back where they belong.
Wipe the coffee table.
Straighten cushions and throws.
Hoover the main traffic area if needed.
A short daily reset keeps the room guest-ready without a major effort.
Keep bedrooms calm with a simple reset system
Bedrooms feel cleaner quickly when the bed is made and surfaces are clear. These two habits do most of the visual work.
Start by opening curtains and a window for a short airing, weather permitting. Then make the bed. It gives the room an instant sense of order and creates a clean surface for folding clothes.
Next, deal with clothing. Put clean clothes away, place worn clothes in a laundry basket, and hang anything that can be worn again. Avoid the “chair pile” if possible. A small hook, valet stand, or labelled basket can help.
Dust bedside tables, wardrobes, windowsills, and lamps. Wipe marks from switches and handles. Hoover under the bed when you can reach it, as dust gathers quickly there.
Bedding does not need to become complicated. Set a regular wash day that fits the household. Keep one spare set ready, so changing sheets is faster and less likely to be skipped.
For children’s rooms, use storage that is easy to maintain:
Open baskets for soft toys
Low boxes for building blocks or cars
Labels with words or pictures
A “home” for school bags and sports kits
One donation box for outgrown items
The easier the system, the more likely it is to be used.

Use time-saving techniques that fit normal days
Cleaning does not need to happen in long blocks. Many homes stay cleaner with short, repeated bursts.
The 15-minute timer method works well. Choose one room, set a timer, and do as much as possible without getting distracted. Stop when the timer ends. This creates momentum and removes the pressure to finish the whole house.
Batching also saves time. Group similar jobs together:
Dust all rooms before hoovering.
Collect bins from every room in one walk-through.
Change all towels on the same day.
Clean all mirrors with the same cloth and spray.
Mop all hard floors at once.
Keep cleaning supplies close to where they are used. Store bathroom cleaner in or near the bathroom, kitchen spray under the sink, and spare cloths in an airing cupboard or utility space. If supplies are always far away, small jobs get delayed.
Another useful rule is to clean as you go. Wipe spills when they happen. Rinse the sink after brushing teeth. Spray the shower after use. Put items away when leaving a room. These habits sound small because they are small, but they prevent build-up.
Try pairing cleaning with an existing routine. Wipe the bathroom sink after brushing teeth at night. Empty the dishwasher while the kettle boils. Sort laundry while watching television. A task attached to a habit is easier to remember.
Choose eco-friendly cleaning solutions with care
Eco-friendly cleaning is not about replacing every product overnight. Start with swaps that are simple, affordable, and safe for your surfaces.
White vinegar works well on many limescale marks, glass, and light grease. Bicarbonate of soda helps with gentle scrubbing and odour control. Lemon can freshen smells and help with light marks. Washing-up liquid diluted in warm water is one of the most useful cleaners in the home.
Good eco-friendly habits include:
Using washable cloths instead of disposable wipes
Buying refills where available
Choosing concentrated products to reduce packaging
Using the smallest effective amount of cleaner
Letting products sit before scrubbing
Ventilating rooms while cleaning
Repairing tools, such as mop heads and hoover filters, rather than replacing entire items
Natural does not always mean suitable. Vinegar can damage some stone surfaces, unsealed grout, waxed wood, and certain appliance parts. Abrasive powders can scratch delicate finishes. Always test a small hidden area first and follow care labels.
For odours, start by removing the source. Empty bins, clean fridge spills, wash pet bedding, and check drains. Fragrance can mask a smell, but cleaning removes it.
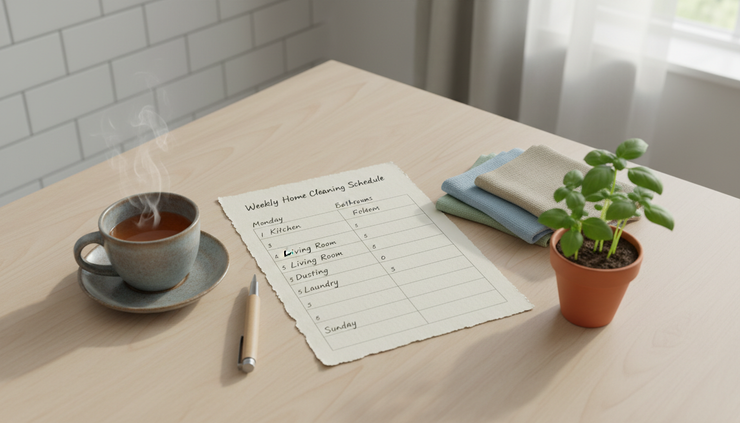
Build a cleaning schedule that suits your lifestyle
The best cleaning schedule is the one that can survive busy weeks. It should match the size of the home, the number of people living there, pets, work patterns, health, energy, and personal standards.
Avoid building a perfect schedule for an imaginary week. Build one for your actual week.
A simple schedule might look like this:
Frequency | Tasks |
Daily | Make beds, wipe kitchen surfaces, wash up, quick tidy, deal with spills |
Two or three times a week | Hoover busy areas, wipe bathroom sink, take bins out, laundry |
Weekly | Clean bathroom, mop floors, dust main rooms, change bedding, clean kitchen appliances |
Monthly | Wipe skirting boards, clean windows inside, sort one cupboard, dust light fittings |
Seasonally | Declutter storage areas, clean behind large furniture, wash curtains or cushion covers where suitable |
If weekends are busy, spread tasks across weekdays. If weekdays are full, choose one reset block at the weekend and keep weekdays light. If energy varies, divide jobs into low-energy and high-energy lists.
Low-energy tasks might include wiping a mirror, folding towels, clearing one drawer, or watering plants. High-energy tasks might include mopping, scrubbing the shower, or cleaning behind furniture.
Shared households benefit from visible task lists. A whiteboard, notes app, or printed checklist can reduce repeated reminders. Assign rooms or tasks clearly, and rotate the less popular jobs.
Try a realistic weekly cleaning flow
Here is a sample flow that avoids doing everything on one day:
Day | Focus |
Monday | Laundry and bedroom reset |
Tuesday | Bathroom clean |
Wednesday | Kitchen appliances and bins |
Thursday | Dust living areas and bedrooms |
Friday | Hoover and mop main floors |
Saturday | One deeper job, such as windows or a cupboard |
Sunday | Light reset and plan for the week |
This is only a model. Swap days, remove tasks, or combine jobs as needed. A smaller flat may need less. A larger family home may need extra laundry and floor care. The point is to give every task a place, so it stops floating around as mental clutter.
If a schedule keeps failing, make it smaller. A routine that covers the basics every week is better than an ambitious plan that collapses by Wednesday.
Finish with small habits that keep the home cleaner for longer
A cleaner home is built through repeatable habits, not one exhausting clean. Start with the rooms that cause the most stress. Create short task lists. Keep supplies close. Use tools that make the work easier. Choose eco-friendly swaps where they suit the job. Then build a schedule that respects real life.
For a strong start this week, pick three changes:
Put together a portable cleaning caddy.
Write a room-by-room checklist.
Choose one daily reset that takes less than 10 minutes.
Once those feel normal, add the next habit. Clean homes do not need perfection. They need a simple system that makes it easy to begin, easy to repeat, and easy to keep going.
Comments